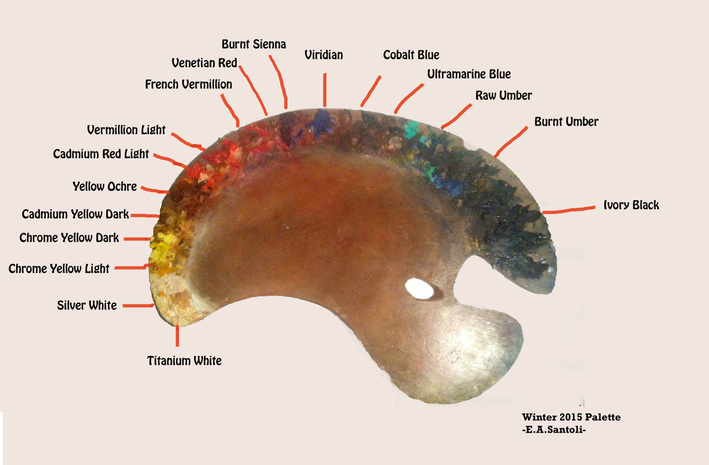
 Finding your own palette of colors is an ongoing process, with frequent changes involved. There are many colors out there and it can be overwhelming to choose what to work with. I actually have three heaping bags of oil colors that I've accumulated over the years; I have used and studied all of them in an effort to counteract my colorblindness. And many of them I have had on my palette at one point or other. Many of my palettes were also inspired by artists of the past. When I admire an artist, I usually begin by studying what colors they use. And then the natural connection is to believe that using their colors will somehow enable me to paint as well as them. This is completely wrong and often times will impact your painting negatively because you are blindly using a pigment without learning the properties of the pigment. The artist whom you respect probably chose that palette because they tried many colors and learned about each color before using them. The best way to prevent this idol worship is to strip away the colors to a very basic palette. You truly only need a handful of colors to complete a painting. Being colorblind, I am a strong believe in the power of value over anything else; your basic palette should have a wide value range. A good basic palette to begin with is: -Titanium White -Flake White -Cadmium Yellow Light -Cadmium Red (Or Vermillion) -Alizarin Crimson -Burnt Sienna -Cobalt Blue -Raw Umber -Burnt Umber -Mars Black I can definitively say that these colors are essentials to any palette. I use a fairly basic palette myself, but I will suggest that you try and figure out what colors you NEED instead of what colors you THINK you need. I recently painted a cat's eye that was a pale yellow color and I realized that I needed naples yellow to achieve the value and effect. I normally don't use naples yellow because it tends to wash my colors out, but I have to say that it's what I needed for this cat's eye. Below is my current palette and I may add colors or take away colors now and then, but I encourage you to go out and find your own colors and try as many as you can. Fill bags with color and keep them in storage because you may need that one special color someday.
0 Comments
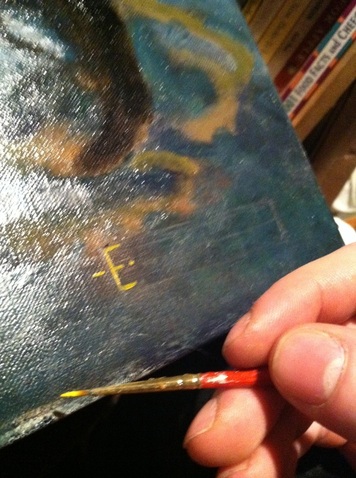
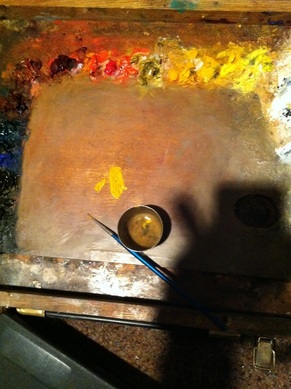
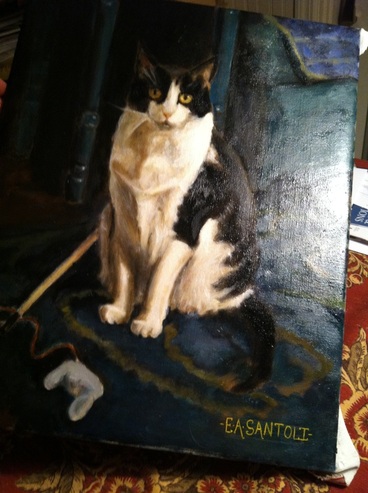
 Signing a painting is a way to mark the end of the painting process. It can be a relief to be signing a painting after weeks and months of work, but I find it often to be one of the most difficult and frustrating parts of the process. I have gone through a couple varieties of signature, but have used a traditional academic signature of -E.A.Santoli- for the past few years and for all of my commissions. Here are some tips about signing a academic painting that I wish someone had told me years ago: -TIP 1: Use a Guideline. The picture on the left shows the beginning process of the way I sign a painting. To make sure that I have enough room and that my letters are straight, I use a comic book lettering technique of drawing 3 parallel lines on the canvas before I get my paint. The lines represent the top, middle and bottom of the letters; you can faintly see these 3 lines in the left-side picture. Drawing the lines also allows you to control the size of your signature.  -TIP 2: Thin Your Paint. I've observed many academic signatures and what I always find is that they're applied in thin and very straight lines. When I see this level of control, then I know that a medium is used instead of straight paint. many paints today don't need much medium to be used during the actual painting, but for the signature, it's better to thin it a little more. *Think of the paint as ink and your brush as a pen nib.  -TIP 3: Use Multiple Layers. I used to think that a signature was accomplished in one layer. I even remember thinking this about the painting itself. The truth is that the advantage of oil painting is in its layers. The same is true of the signature. The picture on the left is after the first pass of oil paint. It's still pretty thin at this point and shows transparency. The key is to be patient and let it dry a little before beginning to solidify and define the signature with more paint.  -TIP 4: Don't Overwork it. It's easy to let your OCD kick in when you're working on the signature. I know this is why it takes me 45 minutes alone to sign the painting. But even the signature should have a sense of controlled spontaneity. It's difficult to know when to stop, but a good rule of thumb is to ask yourself a few questions: 1. Is it legible? 2. Does it look solid? 3. Is it too big or too small? 4. Does it please you as the creator? If you don't think you can make the signature any better, then you are finished. Put your brushes down and step away from the canvas. Signing a painting takes a patient hand and with practice you can develop your hand to produce a beautiful and controlled signature in the academic style. I'm currently working on putting together another step-by-step demo for my latest portrait. I had a great time putting together my last one. So I'm excited to have another in the works.
|
Archives
July 2024
Categories
All
|


 RSS Feed